Step 1: Define the Purpose of Your Garden Studio
The first and most crucial step in designing a garden studio is determining its purpose. Understanding how you plan to use the space will influence every subsequent decision, from size and layout to materials and features.
Common Uses for Garden Studios:
- Home Office: A quiet and separate workspace for remote work.
- Creative Studio: A dedicated space for art, music, or crafts.
- Home Gym: A personalized fitness area.
- Guest Accommodation: A cozy and private space for visitors.
- Relaxation Retreat: A serene escape for yoga, reading, or meditation.
Clearly defining the purpose will help you prioritize features and allocate your budget more effectively.
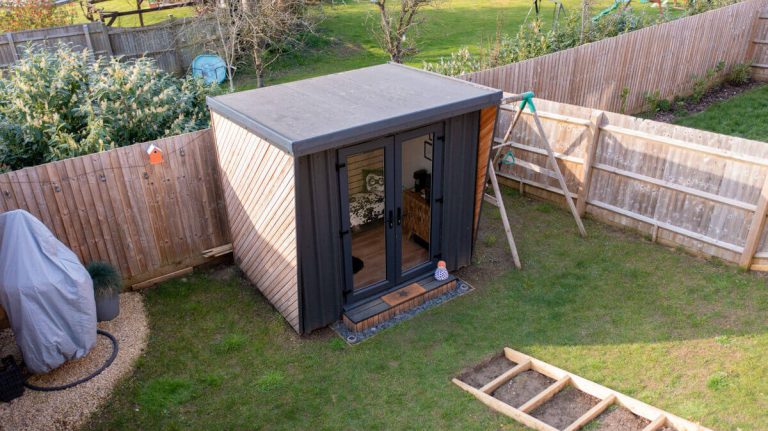
Step 2: Choose the Right Location in Your Garden
The placement of your garden studio can significantly impact its functionality and aesthetic appeal. Consider these factors when choosing the location:
- Proximity to the Main House: Decide whether you want the studio to be easily accessible or tucked away for privacy.
- Sunlight and Shade: Position the studio to maximize natural light if it’s intended for work or creative activities. Use existing trees for shade or plan for shading solutions if the area receives intense sunlight.
- Views and Privacy: Select a spot with the most pleasant garden views while maintaining privacy from neighbors or passersby.
- Ground Conditions: Ensure the chosen location has stable ground and proper drainage to prevent future structural issues.
Step 3: Determine the Ideal Size and Layout
The size and layout of your garden studio should align with its intended use and the available garden space.
Factors to Consider:
- Purpose: A home office may require only a compact studio, while a gym or guesthouse might demand a larger footprint.
- Garden Space: Ensure the studio complements the proportions of your garden without overwhelming it.
- Future Needs: Consider whether you might need additional space later, especially if the studio will have multiple uses.
Layout Tips:
- Divide the space into zones for different activities if the studio serves multiple purposes.
- Include sufficient storage solutions to keep the area organized.
- Optimize the layout for natural light and ventilation.
Step 4: Select Materials That Balance Durability and Style
Choosing the right materials is essential for creating a garden studio that is both functional and visually appealing. Opt for materials that withstand weather conditions while blending seamlessly with your home and garden.
Exterior Materials:
- Wood: A classic choice that complements natural surroundings; consider treated timber or cedar for durability.
- Composite Panels: Low-maintenance and weather-resistant, available in a range of finishes.
- Metal Cladding: Modern and sleek, suitable for contemporary designs.
Interior Finishes:
- Plywood or Plasterboard: For a minimalist and cost-effective interior.
- Natural Wood: Adds warmth and texture to the space.
- Insulated Panels: Essential for comfort and energy efficiency.
Step 5: Focus on Insulation and Climate Control
A well-insulated studio ensures year-round comfort and usability. Proper insulation minimizes energy costs and creates a pleasant indoor environment, regardless of the weather.
Key Insulation Areas:
- Walls: Use high-quality thermal insulation to regulate indoor temperature.
- Roof: Consider reflective or green roofing to reduce heat absorption in summer.
- Floor: Insulate the floor to prevent heat loss during winter.
For climate control, consider installing heating and cooling systems, such as underfloor heating or a compact air conditioning unit.
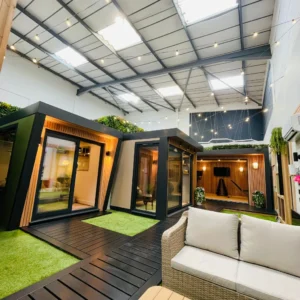
Step 6: Incorporate Natural Light and Ventilation
Natural light and fresh air are vital for creating an inviting and productive space.
Lighting Tips:
- Install large windows or glass doors to flood the space with light.
- Consider skylights or roof windows for additional illumination.
Ventilation Tips:
- Include operable windows to allow fresh air circulation.
- Install extractor fans if the studio will be used as a gym or art studio.
Step 7: Add Features to Enhance Functionality
The features you choose should reflect the studio’s primary purpose.
Essential Features:
- Electricity: Install adequate outlets, lighting, and internet connectivity.
- Plumbing: Necessary if the studio includes a bathroom or kitchenette.
- Storage: Built-in shelves or cabinets to keep the space tidy.
Optional Features:
- Acoustic Insulation: Ideal for music studios or offices.
- Smart Technology: Include smart lighting, temperature control, and security systems.
- Outdoor Decking: Extend the studio’s functionality with a patio or deck for outdoor activities.
Step 8: Match the Aesthetic with Your Home and Garden
Your garden studio should harmonize with its surroundings. Consider its design, color palette, and landscaping to achieve a cohesive look.
Tips for Cohesive Design:
- Use materials and colors that complement your home’s exterior.
- Incorporate garden elements like planters, trellises, or climbing plants around the studio.
- Choose a style—modern, rustic, or traditional—that aligns with your personal taste.
Step 9: Budget and Plan for Permits
Before construction begins, establish a realistic budget that includes all costs, from materials and labor to utilities and furnishings. Additionally, check local regulations to determine whether planning permission is required.
Cost Breakdown:
- Materials and construction: 50-70%
- Utilities and insulation: 10-20%
- Interior furnishings: 10-20%
Step 10: Furnish and Personalize Your Garden Studio
Finally, furnish your garden studio to make it functional and inviting. Select furniture and decor that align with its purpose and reflect your personal style.
Furnishing Ideas:
- Workspaces: Desks, ergonomic chairs, and shelving.
- Relaxation Areas: Sofas, bean bags, and soft lighting.
- Creative Studios: Easels, storage for supplies, and task lighting.
Personal touches, such as artwork, plants, or cozy textiles, can add warmth and character to the space.
Designing a garden studio is an exciting opportunity to create a space that enhances your lifestyle. By following these steps, you can ensure your studio is not only functional but also a beautiful addition to your home. With careful planning and thoughtful design, your garden studio will become a cherished retreat where creativity, productivity, and relaxation thrive.